Mitsubishi Outlander: Head restraints
WARNING:
● Driving without the head restraints in place can cause you and your passengers serious injury or death in an accident. To reduce the risk of injury in an accident, always make sure the head restraints are installed and properly positioned when the seat is occupied.
● Never place a cushion or similar device on the seatback.
This can adversely affect head restraint performance by increasing the distance between your head and the restraint.
To adjust height
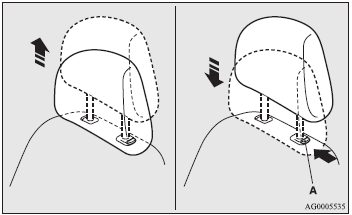
Adjust the head restraint height so that the centre of the Head restraint is as close as possible to eye level to reduce the chances of injury in the event of collision. Any person too tall for the Head restraint to reach their seated eye level, should adjust the restraint as high as possible.
To raise the head restraint, move it upward. To lower the restraint, move it downward while pushing the height adjusting knob (A) in the direction of the arrow. After adjustment, push the head restraint downward and make sure that it is locked.
To remove
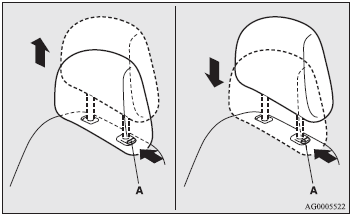
To remove the head restraints, lift the head restraint with the height adjusting knob (A) pushed in.
Installation
CAUTION:
● Confirm that the height adjusting knob (A) is correctly adjusted as shown in the illustration, and also lift the head restraints to ensure that they do not come out of the seatback.
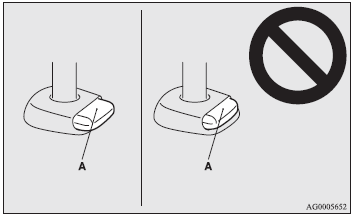
To install the head restraints, first confirm that they are facing the correct direction, and then insert them into the seatback while pressing the height adjusting knob (A) in the direction indicated by the arrows.
CAUTION:
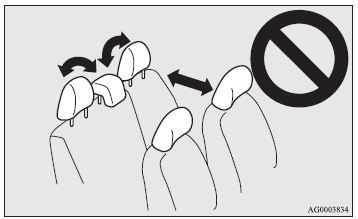
● The head restraints for the seats differ in shape and size. When installing head restraints, make sure the head restraints are fitted in their respective seats.
READ NEXT:
 Making a luggage room
WARNING:
● When making a luggage area, never arrange the seats while the vehicle is being
driven or is on an incline. The seats could move unexpectedly or more than required
and cause a ser
Making a flat seat
By removing the head restraints and fully reclining the seatbacks of the seats,
one large flat seat is achieved.
WARNING:
● Never drive while there are occupants sitting on the flat seat. Th
Seat belts
To protect you and your passengers in the event of an accident, it is most important
that the seat belts be worn correctly While drive.
The front seat belts have a pre-tensioner system. These belts
SEE MORE:
Symptom Procedures
Inspection Procedure 1: TCM cannot communication with scan tool.
TCM POWER SUPPLY CIRCUIT
SYMPTOMS
TCM cannot be turned ON.
PROBABLE CAUSES
Damaged wiring harness and connectors
Malfunction of TCM
DIAGNOSTIC PROCEDURE
STEP 1. Check the following connector:
A-18X CVT control relay connector
C
On-vehicle Service
ID CODES REGISTRATION PROCEDURE
REGISTRATION USING SCAN TOOL MB991958 (M.U.T.-III SUB ASSEMBLY)
Required Special Tools:
MB991958 Scan Tool (M.U.T.-III Sub Assembly)
MB991824: Vehicle Communication Interface (V.C.I.)
MB991827 M.U.T.-III USB Cable
MB991910 M.U.T.-III Main Harness A
By operating
