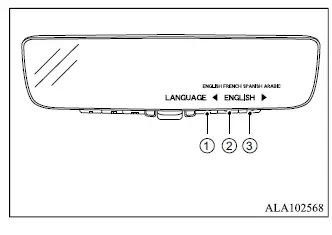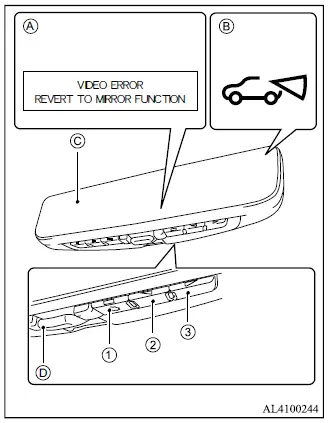
- MENU button
- Center button
- Right side button
- Warning display
- Camera icon
- Mirror/display screen
- Mode select lever
WARNING
- Always adjust the frameless digital rearview mirror before driving.
First switch the system to conventional rearview mirror mode and sit correctly in the driver's seat. Adjust the mirror so that the rear window can be viewed properly. If the mirror is not adjusted correctly before driving, reflections on the mirror surface may make the display difficult to see when digital rearview mirror mode (camera view mode) is selected.
- If warning display A appears while the frameless digital rearview mirror is operating in digital rearview mirror mode, immediately switch to conventional rearview mirror mode.
If warning display A remains visible after some time, have the Mitsubishi Outlander inspected by an authorized Mitsubishi Motors dealer.
- If the rear camera image disappears from the display and camera icon B is no longer shown while digital rearview mirror mode is active, immediately switch the system to conventional rearview mirror mode.
If the camera image and camera icon B do not return after some time, contact an authorized Mitsubishi Motors dealer for inspection.
NOTE
- Each control button is operated by pressing it upward from the bottom side.
Conventional rearview mirror mode
- In this mode, the frameless digital rearview mirror functions as a conventional reflective mirror.
Digital rearview mirror mode
- In this mode, the frameless digital rearview mirror functions as a display screen showing the image from the rear-mounted camera.
Camera icon B appears on the display while digital rearview mirror mode is active.
1. Place the ignition switch in the ON position.
2. Pull mode select lever D.
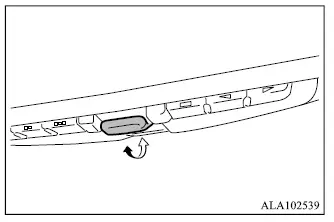
3. The frameless digital rearview mirror switches to digital rearview mirror mode (camera view mode), and the rear camera image appears on the display.
Push mode select lever D to return the Mitsubishi Outlander mirror to conventional rearview mirror mode.
NOTE
- If ambient lighting, glare, or reflections make the digital rearview mirror display difficult to see or uncomfortable to view, switch to conventional rearview mirror mode.
How to make settings of frameless digital rearview mirror
When digital rearview mirror mode (camera view mode) is active, several display settings can be customized, including display brightness, camera viewing angle, image rotation, text indication, dimming mirror operation, and language. Each press of MENU button 1 advances to the next available setting menu in the following sequence.
- MENU (Main menu)
- BRIGHTNESS
- DOWN/UP
- Left/Right
- ROTATION
- INDICATION
- DIMMING MIRROR
- LANGUAGE
NOTE
- To continue to the next setting menu, press MENU button 1 within 5 seconds after making an adjustment in the current menu.
Brightness adjustment
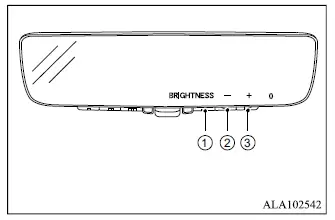
The brightness of the digital rearview mirror display can be adjusted by pressing MENU button 1 once from the Main menu.
- Press center button 2 to decrease the display brightness.
- Press right side button 3 to increase the display brightness.
- Adjustment range: from -2 (dim) to +2 (brighten)
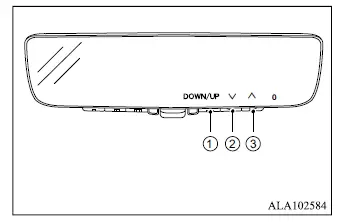
Down/Up adjustment
The vertical viewing angle of the rear camera image can be adjusted by pressing MENU button 1 twice.
- Press center button 2 to move the camera view downward.
- Press right side button 3 to move the camera view upward.
- Adjustment range: from -5 (downward) to +5 (upward)
Horizontal adjustment
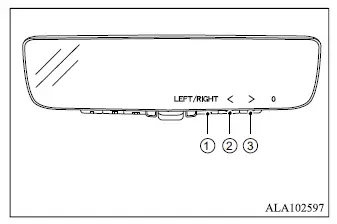
The horizontal viewing angle of the digital rearview mirror image can be adjusted by pressing MENU button 1 three times.
- Press center button 2 to shift the camera view to the left.
- Press right side button 3 to shift the camera view to the right.
- Adjustment range: from -3 (leftward) to +3 (rightward)
Rotation adjustment
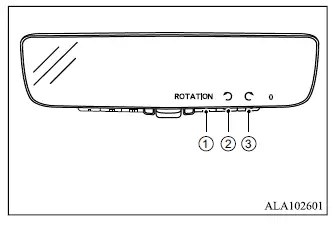
The displayed rear camera image can be rotated by pressing MENU button 1 four times.
- Press center button 2 to rotate the camera image to the left.
- Press right side button 3 to rotate the camera image to the right.
- Adjustment range: from -6 (counterclockwise rotation) to +3 (clockwise rotation)
Indication selection
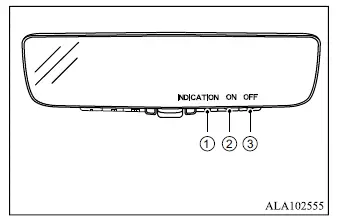
The textual information shown on the frameless digital rearview mirror display can be enabled or disabled by pressing MENU button 1 five times.
- Press center button 2 to enable textual indications on the display screen.
- Press right side button 3 to disable textual indications on the display screen.
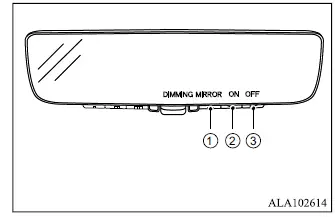
Dimming mirror selection
The DIMMING MIRROR function for conventional rearview mirror mode can be turned on or off by pressing MENU button 1 six times. When DIMMING MIRROR mode is enabled, the frameless digital rearview mirror automatically adjusts its reflectivity according to the intensity of headlights from a vehicle traveling behind the Mitsubishi Outlander.
- Press center button 2 to turn on DIMMING MIRROR mode for conventional rearview mirror operation.
- Press right side button 3 to turn off DIMMING MIRROR mode for conventional rearview mirror operation.
Language selection
The language used for textual information on the frameless digital rearview mirror can be selected by pressing MENU button 1 seven times. Available languages are English, French, Spanish, and Arabic. The factory default setting is English.
- Press center button 2 to select the language displayed on the left-hand side.
- Press right side button 3 to select the language displayed on the right-hand side.
Press MENU button 1 once more, for a total of 8 presses from the Main menu, to return to the Main menu.