Mitsubishi Outlander: Side Air Dam, Under Cover, Roof Rail, Liftgate Spoiler
Side Air Dam
REMOVAL AND INSTALLATION
Removal
- Side air dam
REMOVAL SERVICE POINT
SIDE AIR DAM REMOVAL
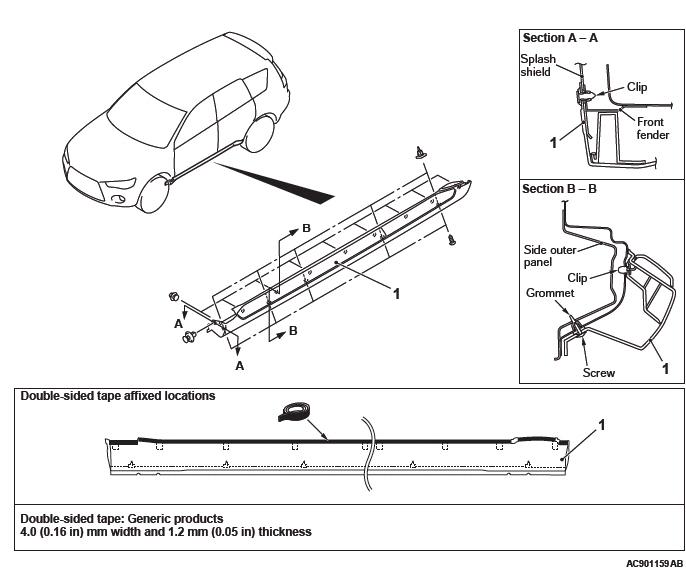
Gently lift and remove the side air dam. If there is any double- sided tape remaining on the side air dam, remove according to the following instructions.
Remove double-sided tape remaining on the body surface (when replacing side air dam).
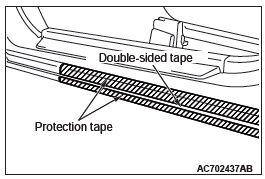
1. Attach protection tape all the way along the edges of the double-sided tape which is still adhering to the body.
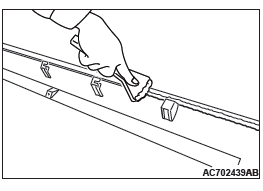
2. Scrape off the double-sided tape with a resin spatula as much as possible.
3. Peel off the protection tape.
4. Wipe the body surface and clean it with a rag moistened with 3M AAD Part number 8906 or equivalent.
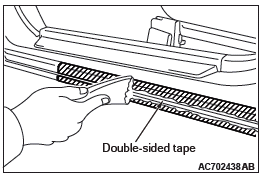
Remove double-sided tape remaining on side air dam and adhere double-sided tape (when re-using side air dam).
1. Scrape off the double-sided tape on the side air dam with a resin spatula as much as possible.
2. Wipe the side air dam surface and clean it with a rag moistened with 3M AAD Part number 8906 or equivalent.
3. Remove only a small portion of the residual adhesive.
4. Adhere the double-sided tape as specified on the side air dam.
INSTALLATION SERVICE POINT
SIDE AIR DAM INSTALLATION
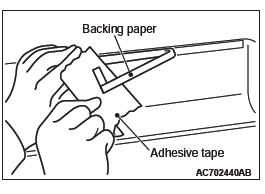
1. Tear off the double-sided tape backing paper.
NOTE: If attach the adhesive tape to the edge of the backing paper, it will be easy to tear off.
2. Install the side air dam.
NOTE: If the double-sided tape is difficult to affix in cold temperature, etc., warm the bonding surfaces of the body and side air dam to about 40 − 60ºC (104 − 140ºF) before affixing the tape.
3. Firmly press in the side air dam.
Under Cover
REMOVAL AND INSTALLATION
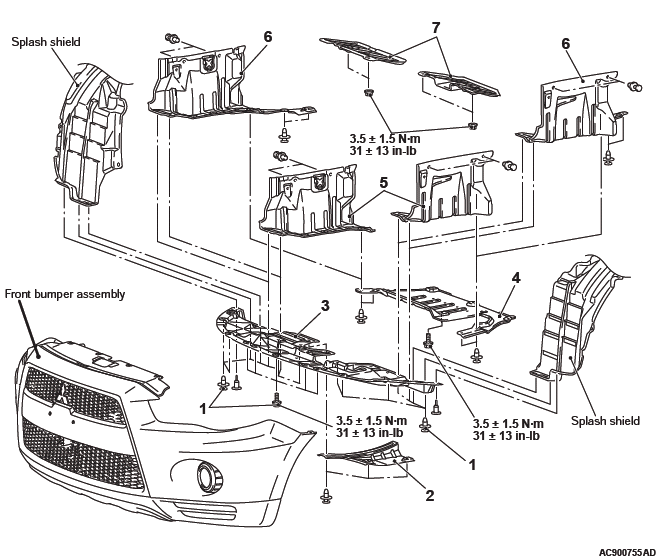
Removal steps
- Front bumper mounting clips and bolts
- Engine room under cover front A <2400 4WD>
- Engine room under cover front B
- Engine room under cover front C <2400>
- Engine room side cover <2400>
- Engine room side cover <3000>
- Front floor under cover
Roof Rail
REMOVAL AND INSTALLATION
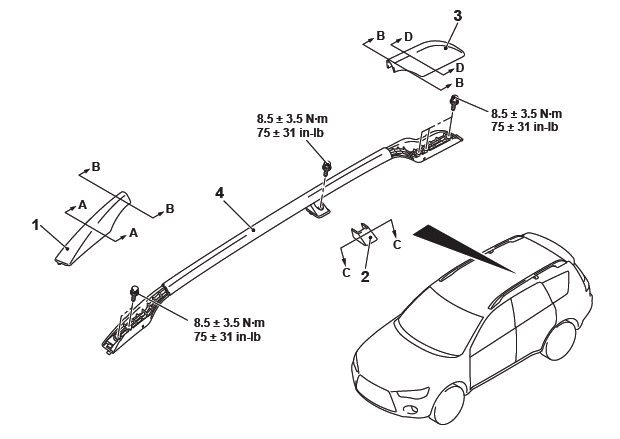
Removal steps
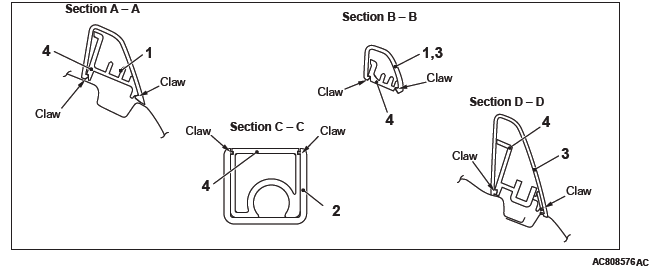
- Roof drip molding front
- Front roof rail cover
- Center roof rail cover
- Rear roof rail cover
- Roof rail
Liftgate Spoiler
REMOVAL AND INSTALLATION
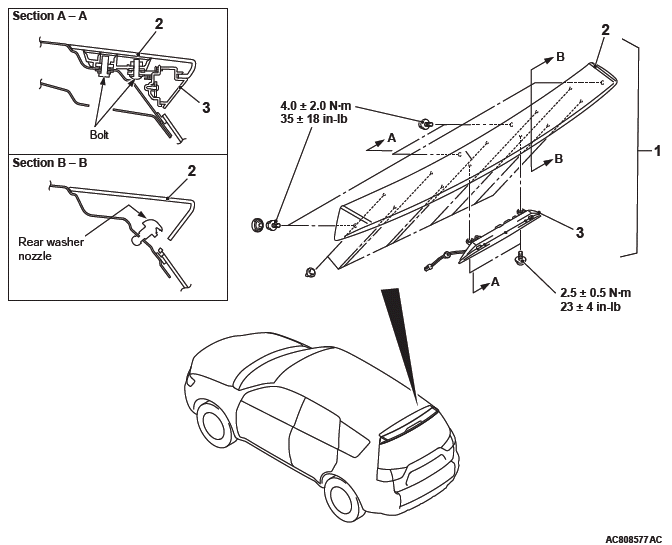
Removal steps
- Liftgate upper trim
- High-mount stop light connector connection
- Liftgate spoiler assembly
- Liftgate spoiler
- High-mount stop light assembly
READ NEXT:
 General Information
WINDSHIELD WIPER AND WASHER OPERATION
Intermittent control (Vehicle speed-dependent
variable type) <Initial condition: with function>
1. ETACS calculates the windshield intermittent wiper inter
Symptom Procedures (Inspection Procedure 1-6)
INSPECTION PROCEDURE 1: The windshield wipers do not work at all.
Windshield Wiper Power Supply Circuit
CIRCUIT OPERATION
The windshield wiper and washer switch sends a
signal through the column-
SEE MORE:
Cup holder
CAUTION:
● Do not drink beverages while driving. This is distracting and could cause an
accident.
For the driver’s seat
There is a built-in cup holder in the instrument panel on the driver’s side.
Pressing the centre of the lid causes the tray to pop out a little.
Pull it out comp
Service Reminder Function Set
HOW TO SET BY OPERATING THE SCAN
TOOL MB991958
CAUTION
If the combination meter needs to be
replaced, the current driving distance and
elapsed days must be entered into the meter
after the replacement in order to be used for
service reminder function. Therefore, read
"Integrated mileage for r
