Mitsubishi Outlander: Radiator Grille, Moldings, Garnishes
Radiator Grille
REMOVAL AND INSTALLATION
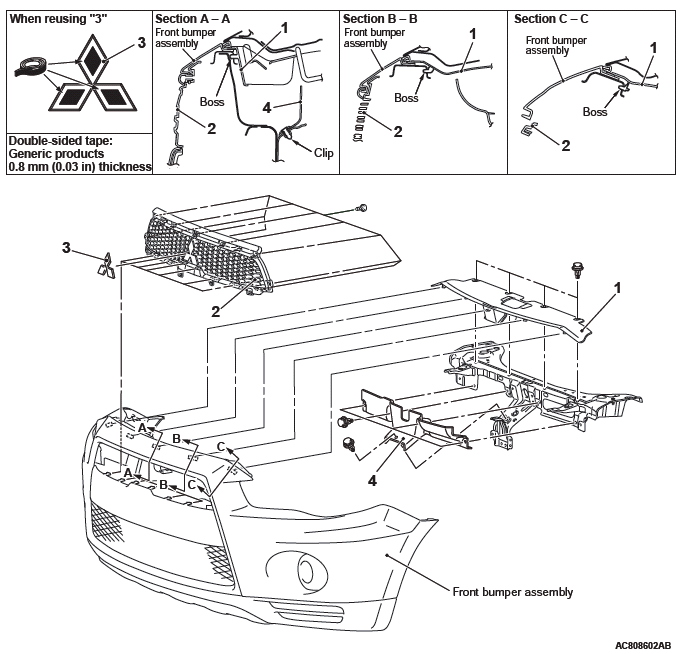
Removal steps
- Headlight support panel cover
- Front bumper assembly
- Radiator grille
- Front-three diamond mark
- Headlight support upper panel cover
Moldings
REMOVAL AND INSTALLATION
Pre-removal and Post-installation Operation
- Roof Rail Removal and Installation
CAUTION Before installing the roof drip molding, the windshield adhesive remained on the clip installation points should be removed 3 to 5 mm (0.1to 0.2 in) from the edge of the glass. However, if the windshield adhesive has not been cured yet, it is not necessary to remove it.
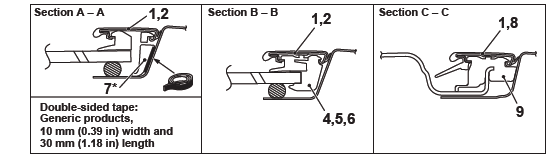
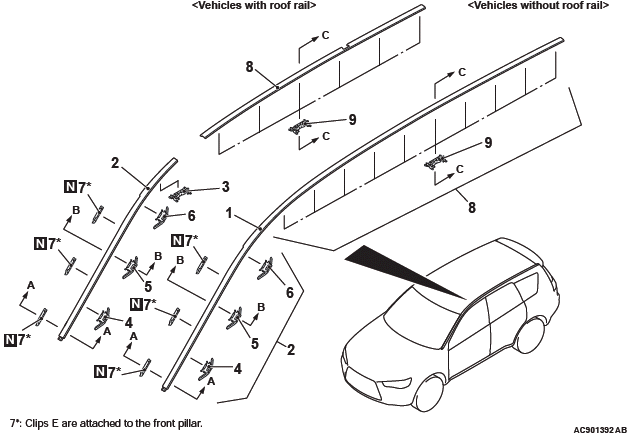
Roof drip molding removal steps
- Roof drip molding assembly
- Roof drip molding A
- Clip A
- Clip B (Red)
- Clip C (Orange)
- Clip D (Pink)
- Clip E
- Roof drip molding B
- Clip A
REMOVAL SERVICE POINTS
ROOF DRIP MOLDING A/ CLIPS A, B, C AND D REMOVAL
CAUTION Remove the roof drip molding A from front to rear or opposite direction in order.
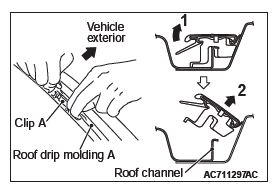
1. Pull up the inner side of roof drip molding A rear end to remove the clip A beneath it attached on the roof channel <vehicles with roof rail>.
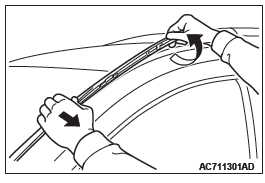
2. Twist the roof drip molding A rear end as shown in the illustration. At the same time, pull the molding to vehicle exterior from rear to front so that the clips B, C and D can be remove from the front pillar. Then, remove the molding from the body.
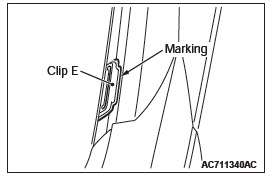
CLIPS E POSITION MARKING TO FRONT PILLAR
CAUTION When replacing the clips E, mark installation position of the clips to the front pillar before removing them.
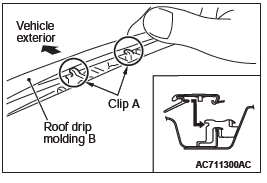
ROOF DRIP MOLDING B/ CLIPS A REMOVAL
CAUTION Remove the roof drip molding B from front to rear or opposite direction in order.
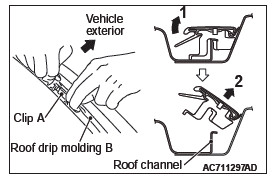
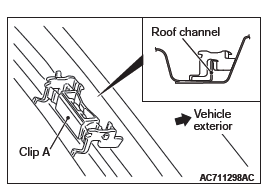
1. Pull up the roof drip molding B inner side to remove the clips A beneath it attached on the roof channel.
2. Rotate the roof drip molding B together with clips A toward vehicle exterior and remove them from roof channel.
INSTALLATION SERVICE POINTS
CLIPS A AND E/ ROOF DRIP MOLDING A INSTALLATION
CAUTION Install the roof drip molding A from rear to front in order.
1. Remove the clip A from the roof drip molding A rear end and attach it to the roof channel <vehicles with roof rail>.
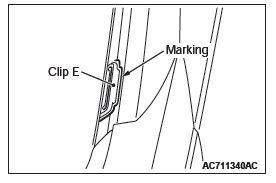
2. When replacing the clips E, install new clips according to the markings drawn at the removal time.
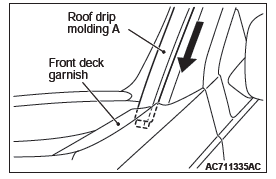
3. Install the roof drip molding A so that its front end is inserted under the front deck garnish.
CAUTION Make certain that the roof drip molding A rear end is not overlapped with roof rail <vehicles with roof rail>.
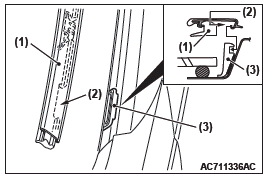
4. Set the roof drip molding A (1) to the front pillar so that cut-out (2) of the molding A (1) is engaged with clip E (3).
5. Push down the roof drip molding A securely so that it is installed to the clip A <vehicles with roof rail> and clips E.
CLIPS A/ ROOF DRIP MOLDING B INSTALLATION
CAUTION Install the roof drip molding B from front to rear or opposite direction in order.
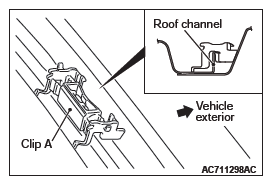
1. Remove the clips A from the roof drip molding B and attach them to the roof channel.
2. Engage the projected portion of the roof drip molding B to the 2 recessed portions of each clip A.
3. Push down the roof drip molding B securely so that it is installed to the clips A on the roof channel.
Garnishes
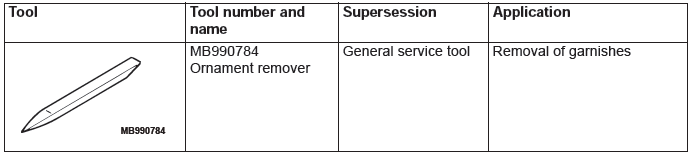
SPECIAL TOOL
REMOVAL AND INSTALLATION
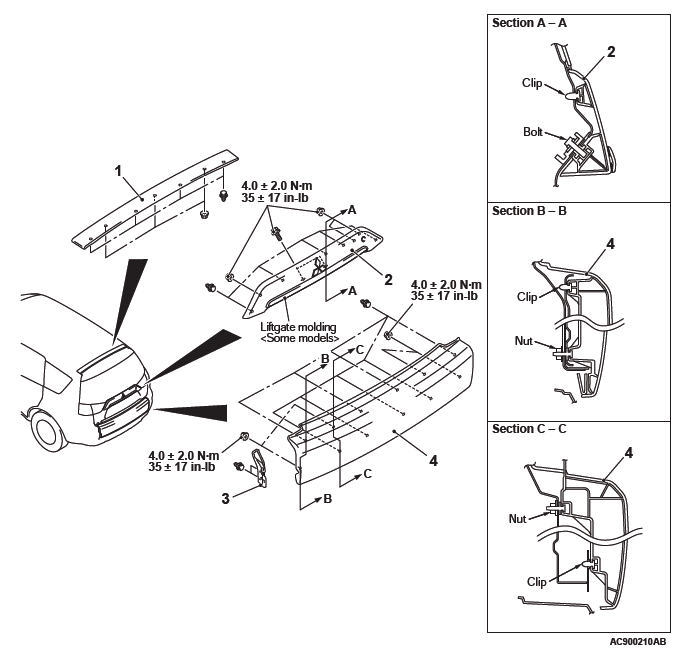
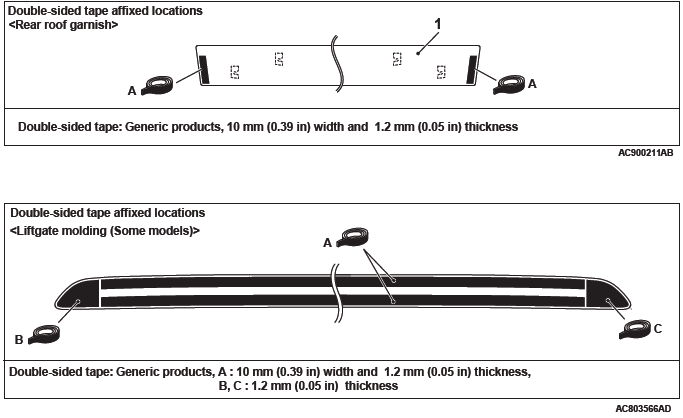
Rear roof garnish removal
- Roof rail
- Headlining
- Rear roof garnish
Liftgate garnish removal
- Rear wiper motor
- Liftgate trim
- Liftgate garnish
Liftgate lower garnish removal
- Liftgate lower trim
- Liftgate garnish cover
- Liftgate lower garnish
Required Special Tool:
- MB990784: Ornament remover
INSTALLATION SERVICE POINT
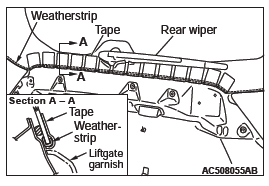
LIFTGATE GARNISH INSTALLATION
CAUTION When installing the Liftgate garnish, roll up the weatherstrip and secure it by a tape as shown to avoid trapping it.
READ NEXT:
 Door Sash Tape
SPECIAL TOOL
REMOVAL AND INSTALLATION
Pre-removal and post-installation operation
Door Trim Assembly Removal and Installation
Door Beltline Weatherstrip Inner Removal and Installation
Door Openin
Side Air Dam, Under Cover, Roof Rail, Liftgate Spoiler
Side Air Dam
REMOVAL AND INSTALLATION
Removal
Side air dam
REMOVAL SERVICE POINT
SIDE AIR DAM REMOVAL
Gently lift and remove the side air dam. If there is any double-
sided tape remaining on the s
SEE MORE:
Rear window demister switch
The rear window demister switch can be operated when the engine is running.
Push the switch to turn on the rear window demister. It will be turned off automatically
in about 20 minutes. To turn off the demister within about 20 minutes, push the
switch again.
The indicator lamp (A) will illum
Cylinder Head Gasket
REMOVAL AND INSTALLATION
Pre-removal operation
Fuel Line Pressure Reduction
Engine Room Under Cover Front B and Engine Room
Side Cover (RH) Removal
Engine Coolant Draining
Air Cleaner Assembly Removal
Ignition Coil Removal
Strut Tower Bar Removal
Exhaust Manifold Removal
Throttle Bod
