Mitsubishi Outlander: Thermostat
REMOVAL AND INSTALLATION <2.4L ENGINE>
Pre-removal Operation
- Engine Coolant Draining
- Engine Upper Cover Removal
- Air Cleaner Assembly Removal
Post-installation Operation
- Air Cleaner Assembly Installation
- Engine Upper Cover Installation
- Engine Coolant Refilling
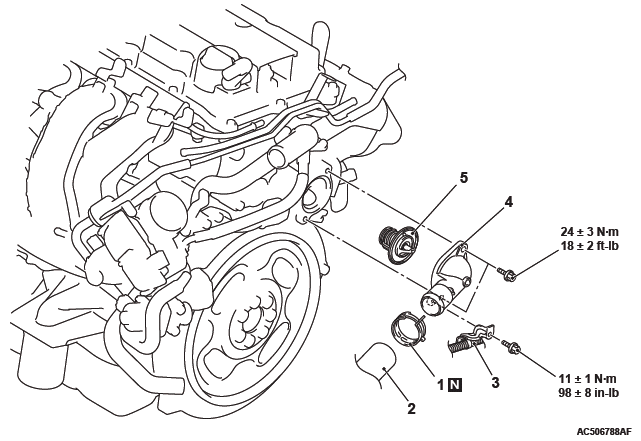
Removal steps
- Hose clip
- Radiator lower hose connection
- Control wiring harness clamp connection
- Water inlet fitting
- Thermostat
REMOVAL SERVICE POINT
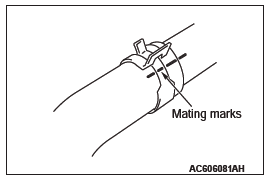
HOSE CLIP/RADIATOR LOWER HOSE DISCONNECTION
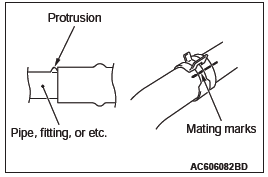
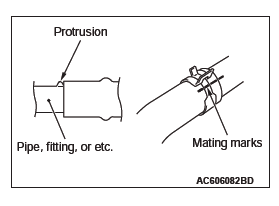
1. Make mating marks on the radiator hose and the hose clamp as shown to install them in the original position. Then, remove them.
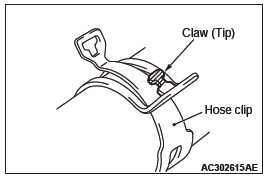
2. Break off the tip of hose clip claw and spread out the hose clip.
NOTE: If there is a hose clip claw, the hose clip cannot spread to capacity because the claw contacts the hose clip.
3. Disconnect the radiator lower hose.
INSTALLATION SERVICE POINTS
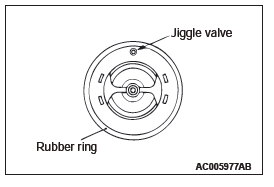
THERMOSTAT INSTALLATION
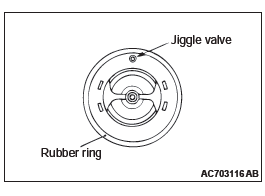
CAUTION Avoid adhesion of grease to the rubber ring of the thermostat.
If the rubber ring is damaged, replace the thermostat.
Install the thermostat with care to avoid peeling or damage to the rubber ring. When installing the thermostat, face the jiggle valve of the thermostat upward.
HOSE CLIP/RADIATOR LOWER HOSE CONNECTION
CAUTION
Never reuse the hose clip whose claw is broken off to prevent the rusting.
1. Make mating mark on a new hose clip in the same position as the remove one.
2. Insert the radiator hose until the protrusion of the water inlet fitting.
3. Align the mating marks on the radiator hose and hose clamp, and then connect the radiator hose.
4. Remove the hose clip claw to tighten the radiator hose.
REMOVAL AND INSTALLATION <3.0L ENGINE>
Pre-removal and Post-installation Operation
- Engine Coolant Draining and Refilling
- Air Cleaner Removal and Installation
- Battery and Battery Tray Removal and Installation
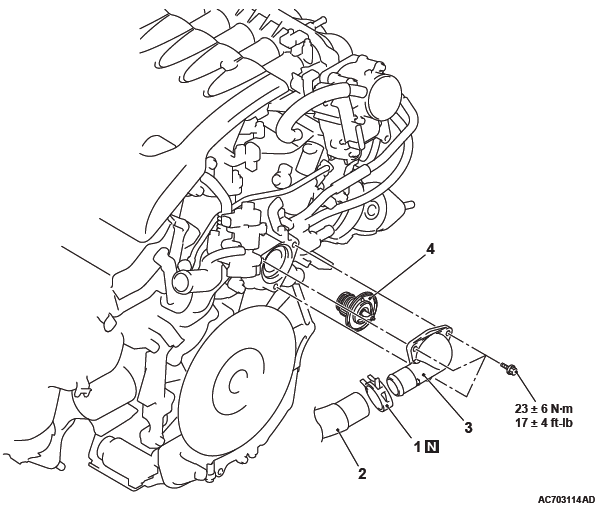
Removal steps
- Hose clip
- Radiator lower hose connection
- Water inlet fitting
- Thermostat
REMOVAL SERVICE POINT
HOSE CLIP/RADIATOR LOWER HOSE DISCONNECTION
1. Make mating marks on the radiator hose and the hose clamp as shown to install them in the original position. Then, remove them.
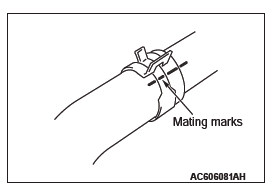
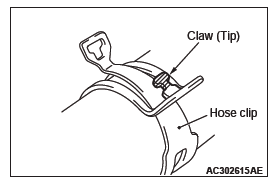
2. Break off the tip of hose clip claw and spread out the hose clip.
NOTE: If there is a hose clip claw, the hose clip cannot spread to capacity because the claw contacts the hose clip.
3. Disconnect the radiator hose.
INSTALLATION SERVICE POINTS
THERMOSTAT INSTALLATION
CAUTION
Make absolutely sure that no oil adheres to the rubber ring of the thermostat. Also do not fold or scratch the rubber ring during installation.
Install the thermostat so that the jiggle valve is facing straight up. Be careful not to fold or scratch the rubber ring.
HOSE CLIP/RADIATOR LOWER HOSE INSTALLATION
CAUTION
Never reuse the hose clip whose claw is broken off to prevent the rusting.
1. Make mating mark on a new hose clip in the same position as the remove one.
2. Insert the radiator hose until the protrusion of the water inlet fitting.
3. Align the mating marks on the radiator hose and hose clamp, and then connect the radiator hose.
4. Remove the hose clip claw to tighten the radiator hose.
INSPECTION
Thermostat Check
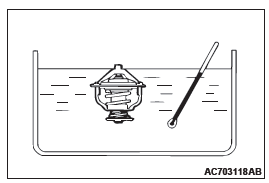
1. Immerse the thermostat in water, and heat the water while stirring. Check the thermostat valve opening temperature.
Standard value:
Valve opening temperature:
87 +- 1.5ºC (189 +- 3ºF) <2.4L ENGINE>
82 +- 1.5ºC (180 +- 3ºF) <3.0L ENGINE>
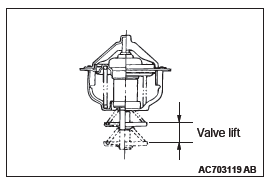
2. Check that the amount of valve lift is at the standard value when the water is at the full-opening temperature.
NOTE: Measure the valve height when the thermostat is fully closed, and use this measurement to compare the valve height when the thermostat is fully open.
Standard value:
Full-opening temperature: 95ºC (203ºF)
Amount of valve lift:
8.5 mm (0.335 inch) or more <2.4L ENGINE>
9.0 mm (0.354 inch) or more <3.0L ENGINE>
Water Pump
REMOVAL AND INSTALLATION <2.4L ENGINE>
Pre-removal Operation
- Engine Coolant Draining
- Drive Belt Removal
Post-installation Operation
- Drive Belt Installation
- Drive Belt Tension Check
- Engine Coolant Refilling
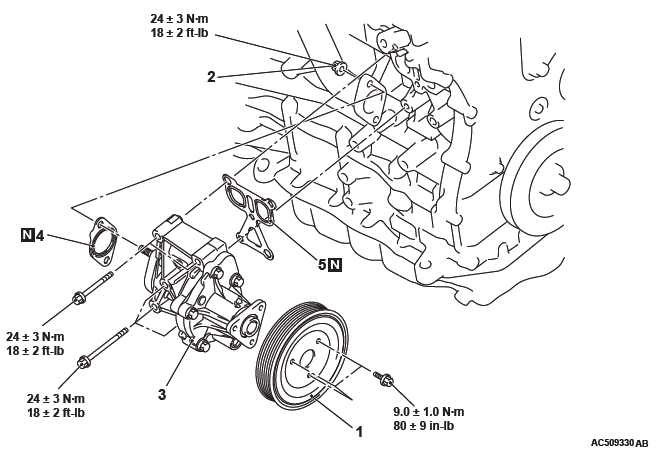
Removal steps
- Water pump pulley
- Water pump inlet pipe mounting nuts
- Water pump
- Cooling water line gasket
- Water pump gasket
REMOVAL AND INSTALLATION <3.0L ENGINE>
Pre-removal and Post-installation Operation
- Engine Coolant Draining and Refilling
- Timing Belt Removal and Installation
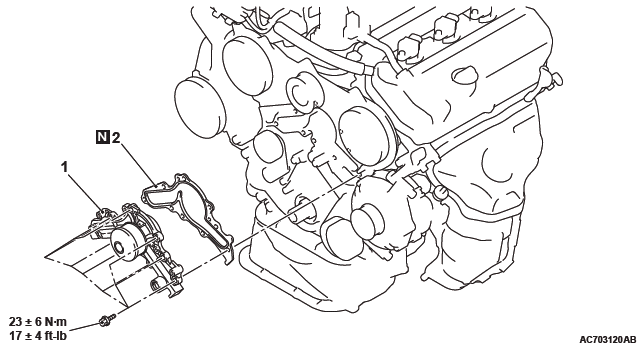
Removal steps
- Water pump
- Water pump gasket

