Mitsubishi Outlander: Engine Overhaul - 2.4L Engine
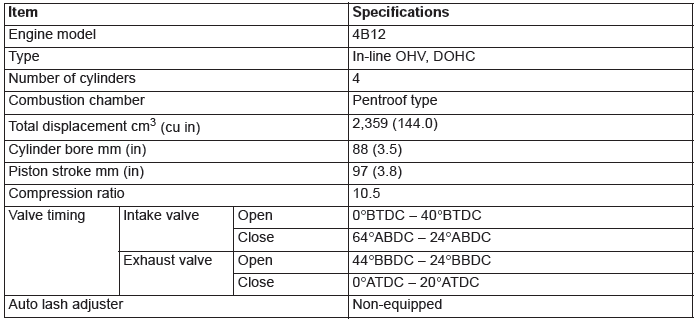
General Specifications
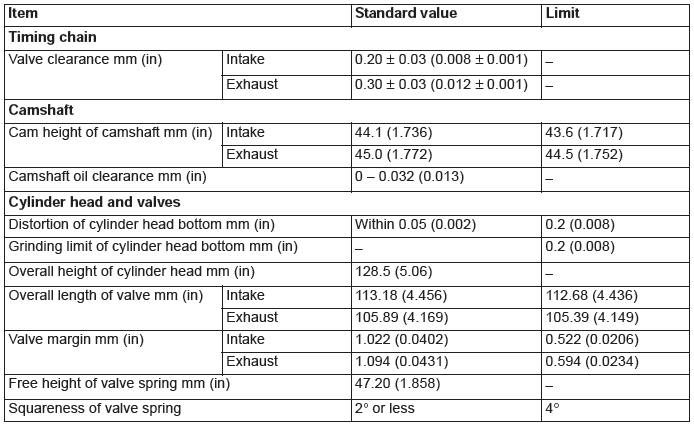
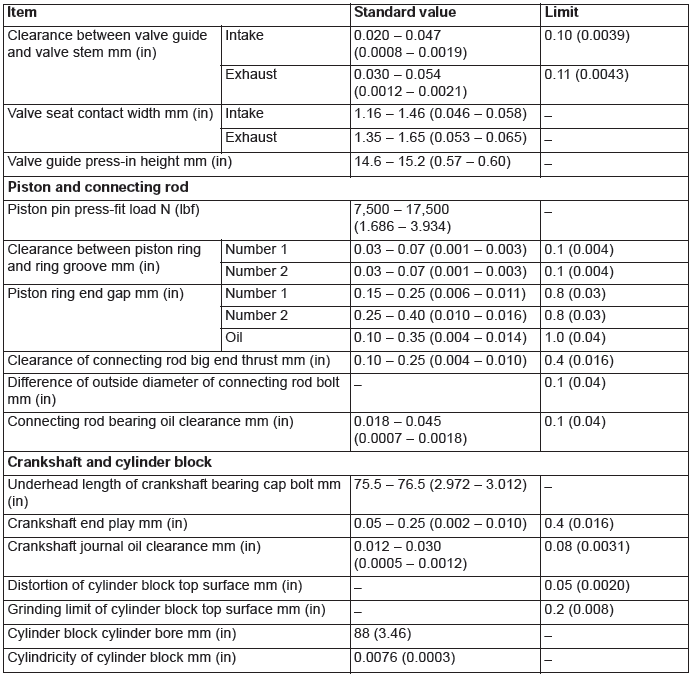
Service Specifications
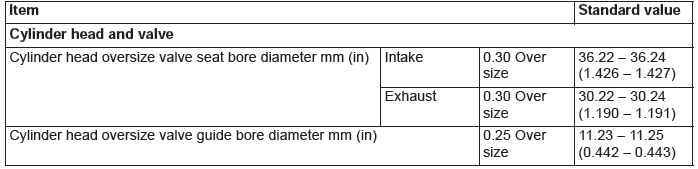
Rework Dimensions
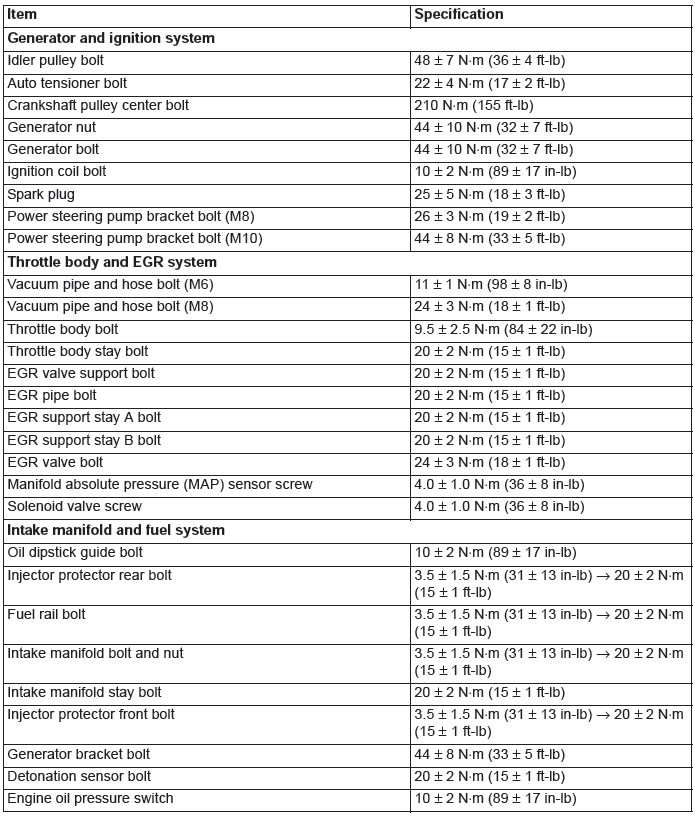
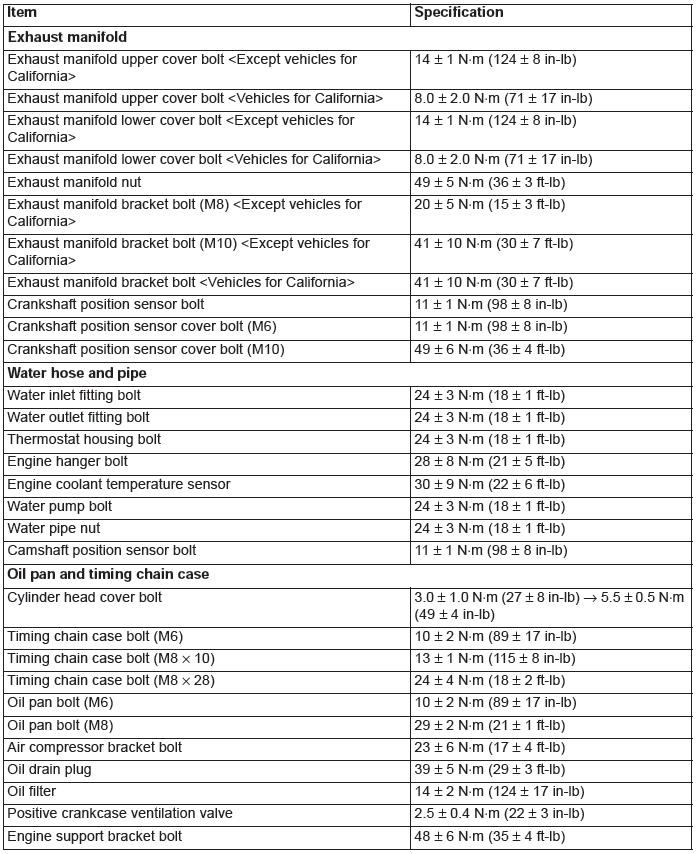
Torque Specifications
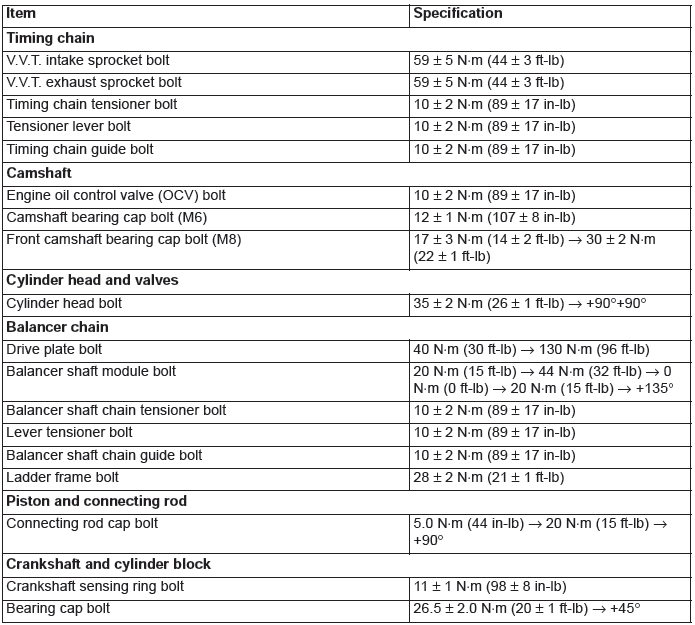
NEW TIGHTENING METHOD BY USING PLASTIC REGION TIGHTENING BOLT
Plastic region tightening bolts are used in some parts of the engine. Install these bolts according to the method described in the body of the manual because the tightening method of these bolts are different from the conventional method. The service limit is determined for these bolts. Be sure to strictly follow the service limit described in the body of the manual.
- Parts to be used
- Cylinder head bolt
- Bearing cap bolt
- Connecting rod cap bolt
- Tightening method
After tightening to the specified tightening torque, further tighten 90º and 90º, or 180º (90º + 90º).
Follow the tightening method described in the body of the manual because the tightening method differs from part to part.
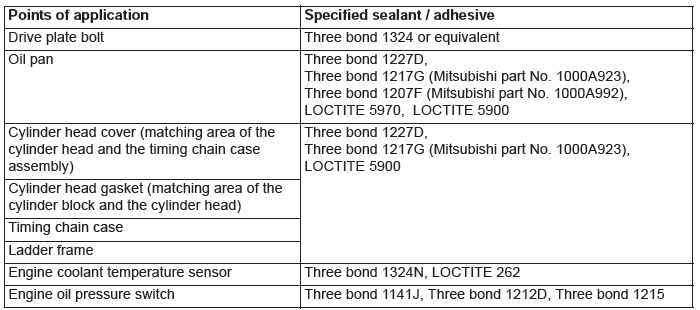
Sealants
NOTE: The number in square brackets shows the genuine part number.
LIQUID GASKET (FIPG)
FIPG is used for some parts in the engine. It is necessary to pay attention to an application amount, application procedure and applied surface condition for this gasket to fully achieve its purpose.
Too small amount causes leakage while too much amount squeezes out to block or narrow water and oil passages. Therefore, it is absolutely essential to apply a correct amount of liquid sealant continuously without break to eliminate leakage from joints.
FIPG used for engine parts hardens reacting with moisture in the air, and is usually used for metal flanges.
CAUTION
Reapply the FIPG with care to the followings.
1. Completely remove the old FIPG including the residue in gaps of parts.
2. Using Mitsubishi genuine parts cleaner (MZ100387) or equivalent, degrease the FIPG application surface carefully.
3. According to the FIPG application procedures, apply it accurately.
DISASSEMBLY
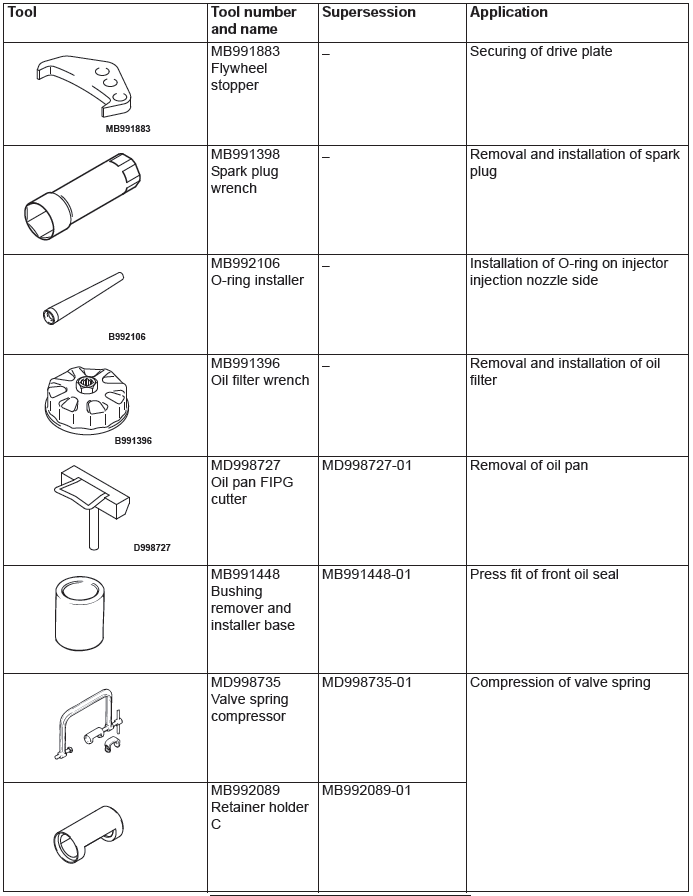
Parts assembled with FIPG can be easily disassembled without using a special method. In some cases, however, it is necessary to lightly tap parts with a wooden hammer or similar tool to break sealant between mating surfaces. Or lightly driving a smooth and thin gasket scraper in mating surfaces is useful, but full care must be exercised not to damage mating surfaces. As special tool oil pan FIPG cutter (MD998727) is set, use this tool.
CLEANING OF GASKET SURFACE
Completely remove all deposits from the gasket surface with a gasket scraper or wire brush. Make sure that the surface to which FIPG is applied is smooth.
The gasket surface must be free from grease and foreign substances. Be sure to remove old FIPG that has entered mounting holes and screw holes.
APPLICATION PROCEDURE
Apply FIPG in a determined diameter and continuously without break. Completely enclose the periphery of mounting holes. FIPG can be wiped off if it is not hardened. Install parts in place while FIPG is still wet. Take care not to allow FIPG to adhere to other locations than necessary locations during installation.
Do not pour oil or water on applied locations or do not start the engine until sufficient time (approximately one hour) passes. The application procedure of FIPG may differ depending on areas. Follow the procedure in the body of the manual to apply FIPG.
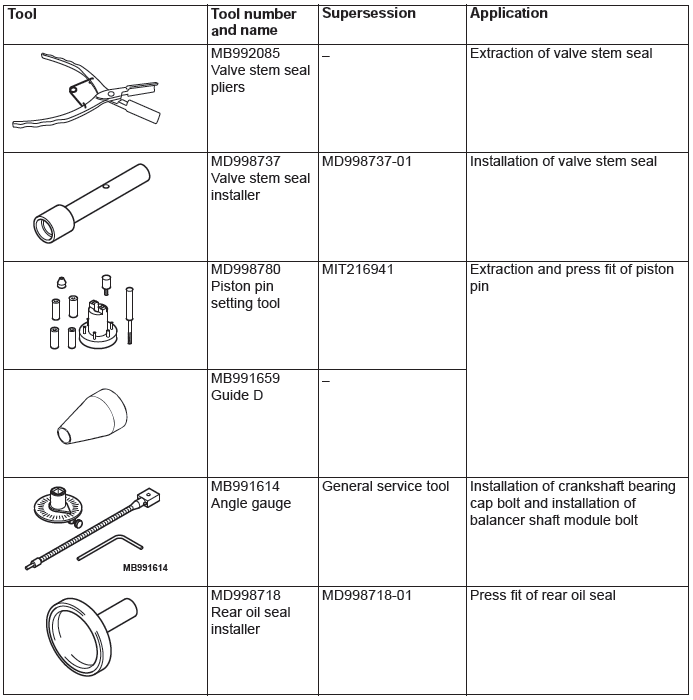
Special Tools
- Generator and Ignition System
- Intake Manifold and Fuel System
- Exhaust Manifold
- Oil Pan and Timing Chain Case
- Timing Chain
- Camshaft
- Cylinder Head and Valves
- Balancer Chain
- Piston and Connecting Rod
- Crankshaft and Cylinder Block
READ NEXT:
 Generator and Ignition System
REMOVAL AND INSTALLATION
Removal steps
Idler pulley
Idler pulley
Generator
Power steering pump bracket
Auto tensioner
Crankshaft pulley center bolt
Crankshaft pulley washer
Crankshaft pulley
Intake Manifold and Fuel System
REMOVAL AND INSTALLATION
Removal steps
Oil dipstick rod
O-ring
Injector protector rear
Bracket
Bracket
Fuel rail assembly
Injection support
O-ring
Injector
O-ring
Fuel rail
Intake manifo
Exhaust Manifold
REMOVAL AND INSTALLATION
<4WD>
Removal steps
Exhaust manifold bracket C
Exhaust manifold bracket A
Crankshaft position sensor cover
Crankshaft position sensor
O-ring
Exhaust manifold upp
SEE MORE:
Rear Wiper and Washer
REMOVAL AND INSTALLATION
Washer tank
Washer motor
Rear washer nozzle removal
steps
Liftgate spoiler
High-mounted stop light assembly
Rear washer nozzle assembly
Rear wiper blade removal steps
Rear wiper blade assembly
Rear wiper blade
Rear wiper motor removal steps
Cover
Rear wip
Diagnostic Item 24-25
DIAGNOSTIC ITEM 24: Short to power supply or ground in both CAN_H and
CAN_L lines of the
CAN-B bus lines.
CAUTION
When servicing a CAN bus line, ground yourself
by touching a metal object such as an unpainted
water pipe. If you fail to do so, a component connected
to the CAN bus line may be damage
